Navigation

The Great Christmas Tree Hunt of 2015

Every year we bundle up and trek through a near-forest of green in search of the perfect Christmas tree. We've done it in near blizzard conditions pregnant chasing a toddler, and we've done it in balmy 60 degree temperatures in rain boots and a sweatshirt pulling two little ladies on a sled. The experience is much like childbirth in that it is painful, exhausting and often filled with screaming, but you can't wait to do it again once you see the end result. You definitely get a little bit of amnesia and don't remember until you're standing on the top of the hill, snack-less, with two little voices alternating between demands of food and potty that you swore last year you'd just cave and buy your tree at Lowe's. It's the worst and the best, and I will probably do it again every year for the rest of my life.

Since we are new to the area, we had to find a different tree farm this year. We lucked out and found a fantastic place about ten minutes from our house. Big Tree Plantation has it down to a science. They offer Santa visits, complimentary hot chocolate, a sweet little holiday store filled with decorations, wagon rides up to the farm and volunteers from the local boys' lacrosse team to tie your tree to the roof of your car. This place was awesome!
We convinced the wagon's driver to take our picture. Now we have a grand total of about five pictures of the four of us since I'm always the one taking the picture!
 This arrangement lasted all of about six seconds, but it was very cute while it lasted!
I leveraged the free hot chocolate to get my smiling picture of my little angels, ha.
 After nearly an hour of searching ,we found our perfect tree. At just shy of 11 feet, we went a little crazy this year!
Once the tree was home and firmly planted in its stand, it was time to lift our little elves up to hang our ornaments.
We only broke about fifty.
Here's the final product. So worth all of the blood, sweat, tears, scrapping elves and eternally dropping needles...
Speaking of elves, we watched Elf with the girls yesterday for the first time.
 Love that movie! 

This morning at the grocery store, the Catfish accosted an elderly lady who offered her a marshmallow sample, yelling "Is there sugar in syrup? Then YES!!!!"

Ten days and counting...


Holiday Swag Tutorial

Picture me running like a crazy person through the Christmas tree farm with a 39 gallon bag gleefully collecting discarded clippings. Yup. It has never occurred to me before to ask for clippings at our local tree farm, and the employees were more than happy for me to take extra clippings off of their hands! They even wrapped quite a few of the larger clippings in with our tree at no additional charge!

 I have added fresh clippings to nearly all of the garland in my house, and it has made an incredible difference in the look and smell of my holiday decor. Because I went a little overboard with my clipping scavenging this year, I had more than enough leftover to make these fun little swags to hand under my carriage lights. It was a quick, easy and very inexpensive project, and I will definitely be making these again next holiday season! 
What you'll need to make two swags:
 a variety of tree clippings, roughly 12-18" (I used two different clippings)
floral wire
two bows
two wire coat hangers
six small weather resistant round ornaments (or small pinecones)
any other fun little weatherproof decorations to add at the end
six twigs, spray painted with Krylon ColorMaster (I used gold, but you can easily do red, silver or any other color)
clippers
It is also helpful to have a small, sassy helper, ha!
 Gather your first set of clippings in a bunch, stems pointing downward. Gather a smaller set of the same type of clipping pointing in the opposite direction. When you're satisfied with the fullness, add your second variety of clipping. Secure with floral wire.
 Use floral wire to attach your bows, twigs and ornaments, sticking your twigs behind the bow to secure them. The Catfish and I had a great time scouring our yard for the perfect twigs. Two quick coats of spray paint and the twigs along with a small section of grass in my backyard were a beautiful gold color!
 Stretch your hanger lengthwise, then place your swag on top and secure with floral wire.
 You're now ready to hang your swag anywhere you'd like! You can also adjust for a horizontal placement by making each bunch of clippings an equal length and securing your bow horizontally.
These two swags should last outdoors throughout the season! Because I already had the floral wire and small ornaments, the cost for this project was a whopping $6 (I've found that Walmart has the best pricing on spray paint, coming in at $3.47. The bows were from Michaels at $1.99 ea. minus 50% and an extra 20% off all sale)! 

Since this was my first attempt, I went with a pretty basic design, but I'm hoping to up the ante a little bit next year and add more color and texture. 

Happy Holidays!

Christmas 2014 Home Tour

I absolutely love decorating for the holidays and was successful this year in wearing my husband down enough that he finally gave the go-ahead for me to start breaking out the Christmas decor around November 10. I know that sounds crazy early, but, decorating for Christmas in a new house can be a daunting task! We also traveled back to Chicago this Thanksgiving, so it was nice not to feel rushed when we got back home. Since I was able to do much of my decorating early, I can focus now on our unexpectedly large Christmas tree (more on that later!). 

After somewhat impulsively painting my front door blue a few weeks ago (for the record, the paint sample was about five shades darker than what we ended up with, although the brighter color is growing on me!), I was excited to put up the door hanger I made last Christmas (thanks, Pinterest!).
 It drives my husband nuts that the J in Joy is off-center. 
That happens to be my special skill! 
Mid-gulp-30s, and I still struggle to cut in a straight line.
The entryway trees were a labor of love too, emphasis on labor. 
I scored the 4' prelit trees from Michaels for $19 each then ordered planters from Amazon for a whopping $6 each. I used Hobby Lobby ornaments and little red bows to decorate. Then my husband I cemented each tree into its planter. 
Done!

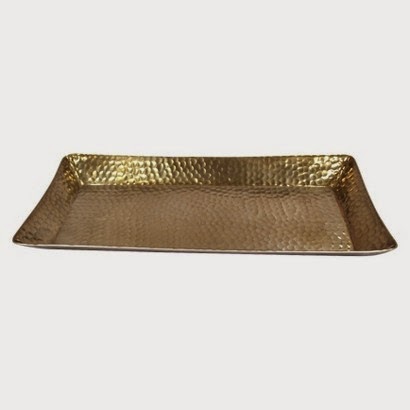
Moving inside, I strayed from my usual flowers-in-the-center-two-pictures-flanking motif for a more asymmetrical look. The score of my holiday season is the little tree dish that I found on a random pop-in at Goodwill for $1! I'm in the throes of a gold spray painting obsession, so I have been scouring antique and hobby stores for things to spray!

The tiny pinecones are courtesy of my lovely neighbor, J., who continues to spoil me rotten. She brought me an enormous box of the most beautiful pinecones from a trip years ago out east. She is feeding my spray painting obsession, ha!
 I tried not to break the bank on decorations- I plan to add more each year and maybe pick up some after-Christmas sale items to add for next Christmas. For now, I repurposed a kitchen serving dish with these ancient holiday candles and, again, some Hobby Lobby ornaments and J.'s pinecones.  
 I'm so excited to fill our sweet Advent calendar for my husband and the girls. I'm finally wising up and planning to put the SAME candies in for everyone so there are no battles over who gets which treat.
 I found this fun runner at Target and plan to keep it out through the cold weather months. I'm really liking gold lately...
 And again with the spray painted pinecones...I can't help myself.
 Here's the tiny tree my girls decorated with sweet little ornaments from their grandma and some tiny balls from Michaels.
 I also shockingly spray painted some backyard twigs gold.
This sign makes me happy. It also cracks me up because my neighbor thought it said "Have yourself a very crazy Christmas".

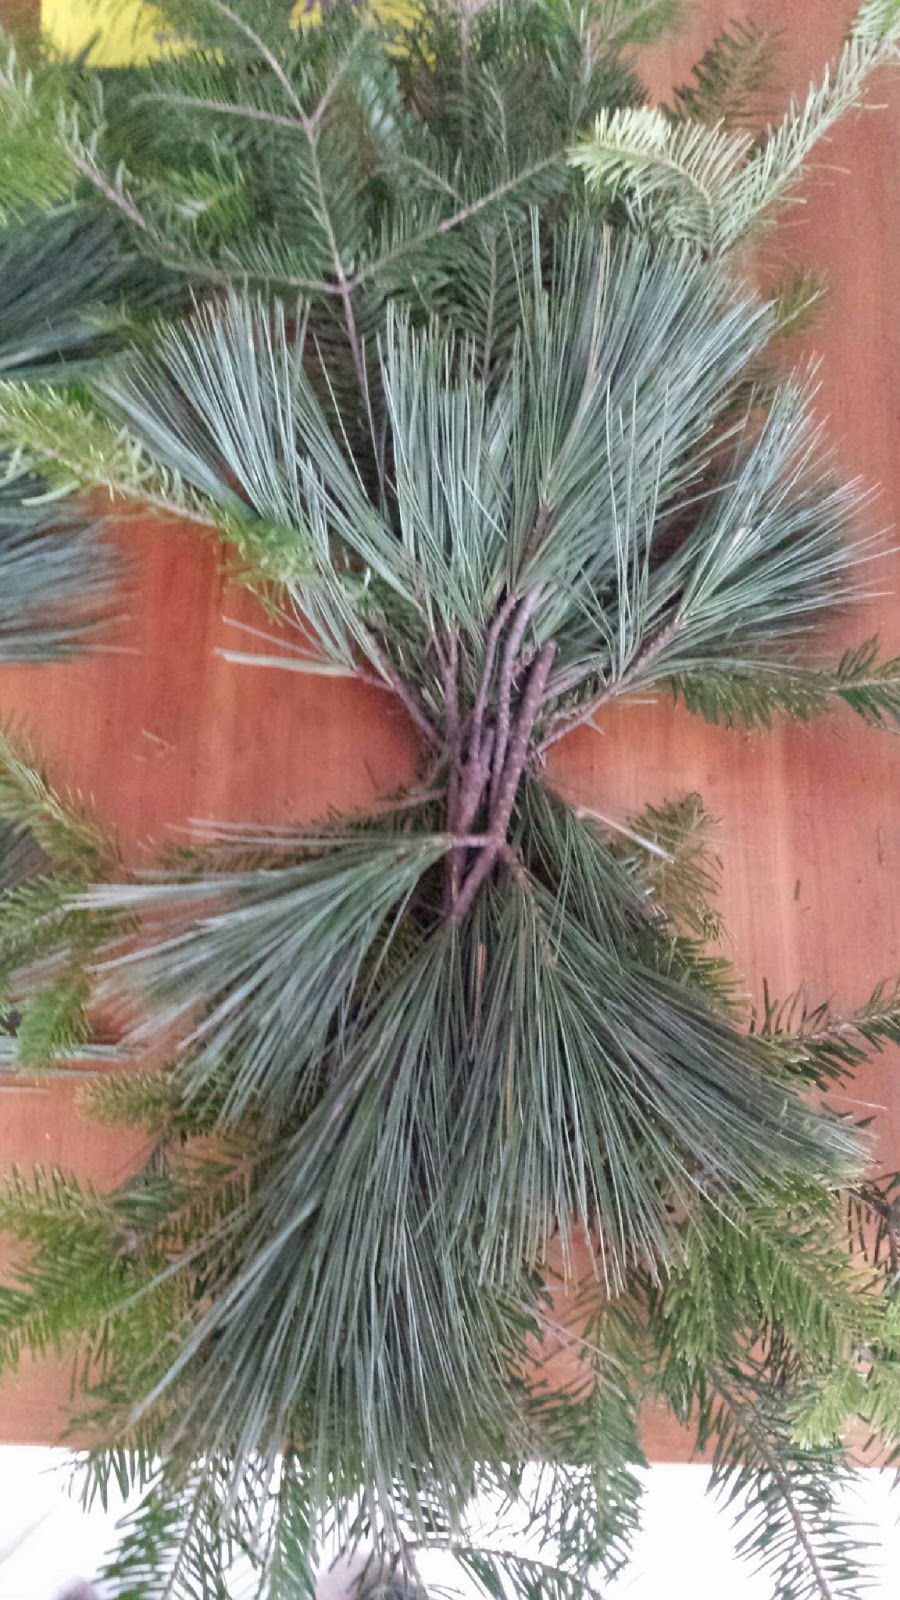
 I've also been on a mission to find clippings to supplement my garlands. 
I had a rather embarrassing trek in suede booties through the snow a week ago to rescue a beautiful branch that had fallen by our clubhouse. I like to keep it classy. 
 I added some colored ornaments to my old front door wreath to hang over our mantel. Next year I plan to upgrade the garland. For the time being, I just stuck some of the clippings from my snow adventure here and there.
 The girls are slowly decorating the craft Christmas tree and have added some fun holiday art projects to our window. Since we have a stainless fridge that doesn't hold magnets, we've had to be creative with our artwork placement.
 More on the top project in another post!
 Nothing too crazy going on in the front hall bathroom. 
I do have to point out that the Catfish loves the peppermint soap so much that she has been accosting guests with requests to "smell my fingers!" after a trip to the bathroom. 
 My husband is BEYOND thrilled that I finally finished our stair garlands. He has endured an incredible amount of discussion and has politely feigned interest in the thousands of Pinterest pins I've made him view.
 I went with a bottom staircase garland so that the tiny hands going up and down the stairs can still use the bannister. I'm noticing that having the decorations lower makes them less likely to be touched and pulled at by the aforementioned tiny hands.
I started with plain garland from Michaels and added Hobby Lobby shatterproof ornaments along with red and gold picks from JoAnn Fabric. 
Then I used two different kinds of clippings to add some depth and variety to the garland. 
 So there it is- the highlights of my Christmas decor for 2014!

I can't wait to host family in a few weeks and am looking forward to making some fun new holiday memories in our new home this year.

Happy Holidays!


Hot Cocoa Cookies

If you know me, you know I love to bake and am a complete sucker for a seasonal treat. These fantastic cookies are a riff on Glorious Treats' Rocky Road cookies and have very quickly become a hit among both family and friends. The base of these cookies is quite possibly the best ever chocolate cookie. Rich and moist, these cookies are the perfect marriage of cookie and brownie.

 Since these treats are not based on an original recipe, I hadn't intended to post them (hence the awesome cell phone shots!). After putting a picture up on Facebook and Instagram, I received quite a few requests for a post.

Requests granted!

The beauty of this recipe is that it can be modified in so many different ways...peppermint mocha, rocky road, pecan praline...the possibilities are endless! 
 Adapted from the absolutely fantastic Glorious Treats recipe for Rocky Road Cookies found here.

Ingredients:

for the cookies-
1 stick of softened, salted butter
1 1/2 cups of semi-sweet chocolate chips
1 1/2 cups all-purpose flour
1/4 cup cocoa powder
1 1/4 cups light brown sugar
1 1/2 tsp. baking powder
1 tsp. vanilla
1/4 tsp. Kosher salt
3 eggs, room temperature
1 bag mini-marshmallows (you'll use most, but you need a whole bag because you will need some leftover to eat while you bake, duh.)

for the glaze- 
1 tbsp. butter
3/4 cups semi-sweet chocolate chips
3/4 cups mini-marshmallows

Assembly: 
Preheat your oven to 350 (mine runs hot, so I always heat to 330). Melt the butter and chocolate chips in the microwave in 30 second intervals. If it gets clumpy, add a splash of cream or half and half then stir. In your mixing bowl, mix the eggs, brown sugar and vanilla for one minute on medium-high speed. Add the chocolate-butter mixture and combine on low speed. Add in the salt, baking powder, cocoa powder and flour, mixing on medium-low until combined. Scrape down the bowl and mix briefly until no lumps remain. Using two spoons or a cookie scoop like this one, drop by the tablespoon on a greased cookie sheet. Bake for about ten minutes until partially cooked then remove from the oven and press four mini-marshmallows into the center of each cookie. Bake on the top rack for another five or so minutes until cookies are done and marshmallows are toasted. While cookies are baking heat the glaze ingredients in a small sauce pan until completely melted. Cool for a few minutes before pouring into a quart baggie or a plastic squeeze bottle (awesome tool, but a pain in the tush to clean!). When you're ready, snip the tip of the baggie and drizzle the marshmallow chocolate across your cookies. Make sure you drizzle some in your mouth too. Just saying. Store on a cake plate or in a container for 3-4 days. 

Make sure you bring some to your neighbors. 
They will love you for it.
I promise.
Photo credit to my sweet friend, Stacey.
 Stay tuned for a fun and completely hilarious holiday craft coming soon!

Christmas OBSESSED.

As soon as the temperature falls below 60 degrees, I am consumed by Christmas. I am one of those people who fights the urge to decorate the instant that Halloween is over, yes, but I'm owning it! 
Thank goodness my husband draws the line at putting up the tree before Thanksgiving otherwise, I'd have THAT on my conscience!

Since this will be our first Christmas in our new home, I'm doing a lot of pinning and Google searching to find ideas for front door, mantle and dining room table decorations.

I've decided on two small trees flanking our front door and thankfully found one heck of a deal at Michaels this morning! Check it out here! Now I just have to figure out how to get the tree bases to stay in my planters.
 I'm thinking maybe foam blocks? Ideas welcome!
 I love the aesthetic here. I'm taking baby steps and will probably deck out our windows next Christmas since I have some many other decorations to figure out in the next few weeks.
I came across this front porch decor and was a little bewildered. 
That's like roughly $600 worth of Hunter boots... I have no words.
Beyond the front door, I'm on the lookout for a pretty, festive tablescape for my dining room. There are so many great ideas out there...thinking I'd like to incorporate candles and some fresh greenery into mine like the two below...
And I will definitely have some of these around the house! 
There's nothing better than a house that smells like Christmas.
If you're in the market for some new decorations, I love, love, love Target's 2014 Christmas line.
They just keep upping the ante every year!
Here are a few of my faves: 


In saving all of these pictures, it is now apparent to me that I am GOLD OBSESSED this year. 

In other related news, the Catfish threw down leaving preschool this morning screaming at the top of her lungs, "I want to go to Target to look at Christmas decorations!"
It was awful and awesome at the same time as I was filled with both pride and shame. 

Can't wait to share my decorations once they're finished!

Happy Holidays!